

Despite all of the advances in digital music technology, tube amplifiers continue to be hugely popular amongst guitarists, bassists, and other musicians. There are elements of the authentic, warm sound of a tube amp that simply cannot be replicated.
One of the only downsides to using a tube amp is that the preamp and power tubes can malfunction, and often need replacing if they’re used extensively. This can cause frustrating problems, like a lack of volume, or the sound cutting out.
In this guide, I’ll explain the likely reasons that your tube amp is losing volume, and outline the steps you can take to rectify the problem.
Why Does Your Tube Amp Lose Volume?
Tube amps can lose volume for several reasons, but the most common is that the vacuum tubes are overheating. This usually results in one or all of the tubes needing to be replaced, but in some cases, you can fix the problem without requiring a new set of tubes.

Diagnosing The Problem
Tube amplifiers may look complex, but they are fairly simple devices. However, when you experience problems with this type of amp, there are many potential causes.
Consequently, it’s essential to diagnose the issue so that you avoid wasting your time and can quickly get the amp working properly again.
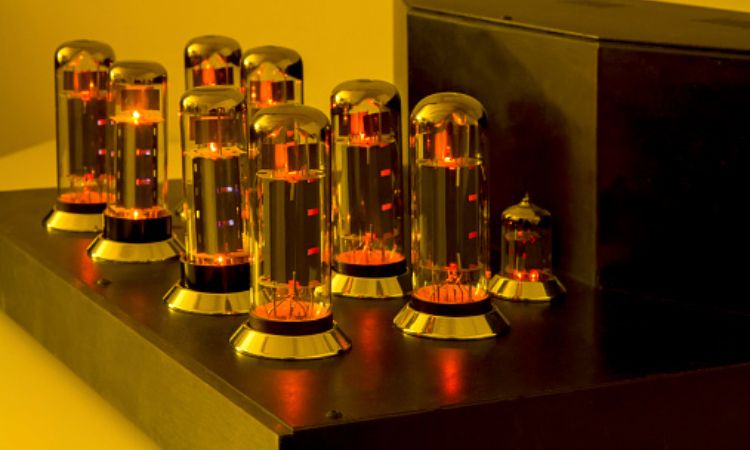
Checking Your Amp’s Tubes
It’s surprising how many musicians own tube amplifiers but have no idea which tubes are installed within their device. Preamp and power tubes have a significant impact on the tone and dynamics produced by the amplifier, so it’s important to know what you’re working with.
If you’ve never swapped out the tubes in your amplifier, you can check the specifications to find out which exact preamp and power tubes are currently installed.
Depending on the size and wattage of your amplifier, you may have more than one tube in both the preamp and power section. To diagnose the problem, it’s helpful to know the number and type of the tubes you’re using.
Assessing The Issue
If your amplifier is suddenly losing volume, then returning to a normal level periodically, this indicates an issue with one or several of the tubes.
This may occur once, then never happen again, but it’s not worth risking your amp suddenly becoming quiet when you’re midway through your next performance, or almost at the end of a perfect recording.
Crackling and popping sounds are also a symptom of a malfunctioning tube, but these issues could also be the result of a loose connection within the amplifier.
How To Fix Your Tube Amp’s Low Volume

Before you call up your local amplifier store and get booked in for a repair, try the steps I’ll outline in this section.
Don’t worry – providing you follow these instructions properly, you won’t make the problem worse or cause irreparable damage to your amplifier!
Step 1 – Turn It Off
This may seem like an obvious step, but the first thing you need to do before attempting to repair your amplifier is to make sure it is turned off.
Ideally, remove the power cable from the back of the amp, or if it is permanently fixed, ensure that the plug is disconnected from the main power source. If you’ve been using your amplifier, leave it to cool down for 15-20 minutes before moving on to the next step.
Step 2 – Remove The Cover
Next, you’ll need to take the cover off the back of your amplifier so that you can access the tubes and other inner components. If you’ve never done this before, you’ll probably need a screwdriver to remove the small screws which hold the cover in place.
The cover should be easy to remove once the screws have been taken out. Make sure you put the screws in a safe place so that you can find them later when the cover needs to be put back on.
Once the cover is removed, shine a small light inside the amplifier and you should be able to see the preamp and power tubes.
Some tubes are coated in protective layers. These will need to be taken off so that you can access the tubes.
Once the protective material has been removed, you should be able to see a grayish surface. The technical term for this component is the “getter”, and its purpose is to maintain the vacuum within the tube.
The first thing to look out for is if the getter has any rust on it. If it does, you’ve found the culprit for your tube amplifier losing volume and that tube will need to be replaced.
Step 3 – Disconnect the Jacks
Shortly, I’ll be instructing you to plug the amplifier back in and turn it on. Before you do that, you need to remove all of the jack cables that are currently connected to the amplifier.
If your tube amp has an effects loop, make sure you disconnect the jack cable, along with any others that you can see which are plugged in.
Step 4 – Test the Tubes
With all of the jacks disconnected, you can now plug the amplifier back in and switch it on. When it has turned on, analyze each of the preamp and power tubes within the amplifier.
The tubes should light up and low slightly, but if there is one that is much brighter than the others, this indicates that the tube needs replacing.
Tubes have a limited lifespan, and the more you use them, the quicker they will go bad and need replacing. If you’ve never had to replace a tube before, you’ve been lucky, but it’s worth knowing how to do this as it will certainly happen again in the future.
To test the tubes, take a small wooden object, and gently strike each of the tubes one after another.
If the tube produces a high-pitched, bell-like sound when it is struck, this is a sign that it has gone bad. If it sounds like a lower-pitched clunk with no rattling, this indicates that the tube is fine.
The chances are, if one of the tubes in your amplifier had rust on the getter or it was lighting up considerably brighter than the others when you turned the amp on, it will also produce a higher-pitched sound when you tap it.
Now you’ve successfully diagnosed the problem, you simply need to check the type of tube, and get a new one to replace it. I’ll provide more information on how to do this in the following section.
When Should You Replace Your Tubes?
There are many different opinions on when you should replace your amp’s tubes, but in reality, it’s a case of paying attention to how they sound and perform.
If your amplifier is losing volume due to the tubes, you should remove whichever is causing the problem and replace it as soon as possible. Otherwise, the performance of your amplifier will be limited.
Should Tubes Get Hot?
Tubes are meant to get hot when they are being used, which makes it tricky to determine whether they are overheating, or producing the right amount of heat.
Some guitarists get concerned when they feel their amplifier and find that it has become hot, but this is normal as the tubes can reach temperatures of around 200 degrees and still work perfectly.
That’s why doing the visual and sound tests that I outlined earlier in this guide are the most effective ways to diagnose a bad tube that may be causing your amp to lose volume.
Indeed, if your amplifier becomes very hot, you should take it to a repair shop to get it checked. It shouldn’t feel excessively hot to touch, and this could be a sign that some of the other components have malfunctioned.
Knowing When To Replace Your Tubes
Problems with low volume, crackling sounds, or other unwanted noises being produced by your amplifier suggest an issue with at least one of the tubes.
Some musicians like to replace their tubes regularly, to avoid them degrading to the point where it affects their sound. This is understandable if you’re touring extensively and need to retain the best sound possible from your amplifier.
However, for the average person, it’s probably not practical to swap out your EL34s or 6L6s after every few shows.
It’s a case of monitoring the sound of your amplifier, and taking a look at the tubes when the am is turned on regularly to gauge when they may need replacing.
Final Thoughts
The information in this guide will hopefully help you to diagnose the problem and get your amplifier back to full volume without much hassle. If the problem persists, it’s advisable to take the amp to a professional who is likely to know what’s going on.